Introduction
In today’s digital age, clear and sharp photos are essential for everything from personal memories to professional presentations. However, capturing the perfect shot isn’t always easy. Many factors can result in blurry photos, and while it may seem like these images are ruined, there are several ways to enhance them using online tools. In this comprehensive guide, we’ll explore various methods to enhance blurry photos online, ensuring your precious memories and important visuals are always in the best quality possible.
Understanding Blurry Photos
What Causes Blurry Photos?
Blurry photos can be frustrating, especially when the moment captured is irreplaceable. Here are some common causes of blurry photos:
- Camera Shake: This occurs when the camera moves while the shutter is open, resulting in a smeared image.
- Incorrect Focus: If the camera or subject isn’t properly focused, the photo will appear blurry.
- Low Light Conditions: Inadequate lighting can force the camera to use slower shutter speeds, increasing the risk of blur.
- Fast-Moving Subjects: Capturing fast-moving subjects can result in motion blur if the camera’s shutter speed isn’t fast enough.
Understanding these causes can help in both preventing blur in future photos and in effectively enhancing blurry images.
Types of Blur
Different types of blur require different enhancement techniques. Here are the main types:
- Motion Blur: Caused by movement during the exposure time. It often appears as streaks or trails following the direction of motion.
- Out-of-Focus Blur: Occurs when the subject is not in the camera’s focal plane. This type of blur is often uniform and smooth.
- Gaussian Blur: A type of out-of-focus blur that follows a Gaussian distribution, creating a smooth, evenly distributed blur effect.
Each type of blur has unique characteristics, and recognizing them can help in choosing the right enhancement method.
Methods to Enhance Blurry Photos
Basic Techniques
When it comes to enhancing blurry photos, starting with basic techniques can often yield significant improvements. Here are some simple adjustments you can make:
- Adjusting Sharpness and Clarity: Most photo editing tools have sliders for sharpness and clarity. Increasing these settings can help define edges and make details more apparent. However, be cautious, as over-sharpening can create unwanted artifacts and noise.
- Using Contrast and Brightness Adjustments: Adjusting the contrast can make the subject stand out more, while tweaking the brightness can help in revealing hidden details in darker areas. These adjustments don’t directly fix blur but can enhance the overall perception of the photo’s quality.
Advanced Techniques
For more pronounced improvements, advanced techniques can be employed:
- Unsharp Mask: This is a popular method in photo editing software that enhances the contrast of the edges, making the photo appear sharper. The process involves creating a slightly blurred version of the original image and then comparing it with the original. The differences between the two images are then used to sharpen the original.
- Deconvolution Algorithms: These are more sophisticated methods that attempt to reverse the blurring process by mathematically modeling the blur and applying an inverse operation. Tools like SmartDeblur use deconvolution to enhance photos significantly.
- AI-Based Enhancement Tools: Recently, artificial intelligence (AI) has made great strides in photo enhancement. AI tools analyze the photo and apply complex algorithms to enhance details. These tools are often easier to use and can produce impressive results. Examples include Adobe Photoshop’s Neural Filters and online tools like Let’s Enhance and Deep Image.
Example: Enhancing a Blurry Photo Using Basic and Advanced Techniques
Let’s consider a case study where we use both basic and advanced techniques to enhance a photo:
- Original Photo: A photo with noticeable blur due to camera shake.
- Basic Adjustments:
- Increase sharpness by 20%.
- Adjust clarity by 15%.
- Enhance contrast by 10%.
- Result: The photo looks slightly better, but the blur is still evident.
- Advanced Techniques:
- Apply Unsharp Mask with the following settings: Amount: 150%, Radius: 2 pixels, Threshold: 10.
- Use deconvolution with a standard deblurring tool.
- Result: The edges are much sharper, and details that were previously hidden are now visible.
- AI Enhancement:
- Upload the photo to an AI tool like Let’s Enhance.
- Select the ‘Enhance’ mode and apply.
- Result: The photo looks significantly clearer, with enhanced details and minimal artifacts.
By combining these methods, you can achieve the best possible enhancement for your blurry photos.
Online Tools to Enhance Blurry Photos
Top Online Tools
Enhancing blurry photos online is convenient and often free. Here are some of the best tools available:
- Fotor: A versatile online photo editor that offers a wide range of editing features, including tools specifically designed to enhance blurry images.
- Pixlr: Known for its user-friendly interface, Pixlr offers powerful tools for sharpening and clarifying photos.
- Enhance.Pho.to: This tool specializes in enhancing photos by automatically adjusting sharpness and clarity.
- Vance AI: Utilizes AI technology to enhance photo quality, offering impressive results with minimal effort.
Step-by-Step Guide to Using Each Tool
Fotor
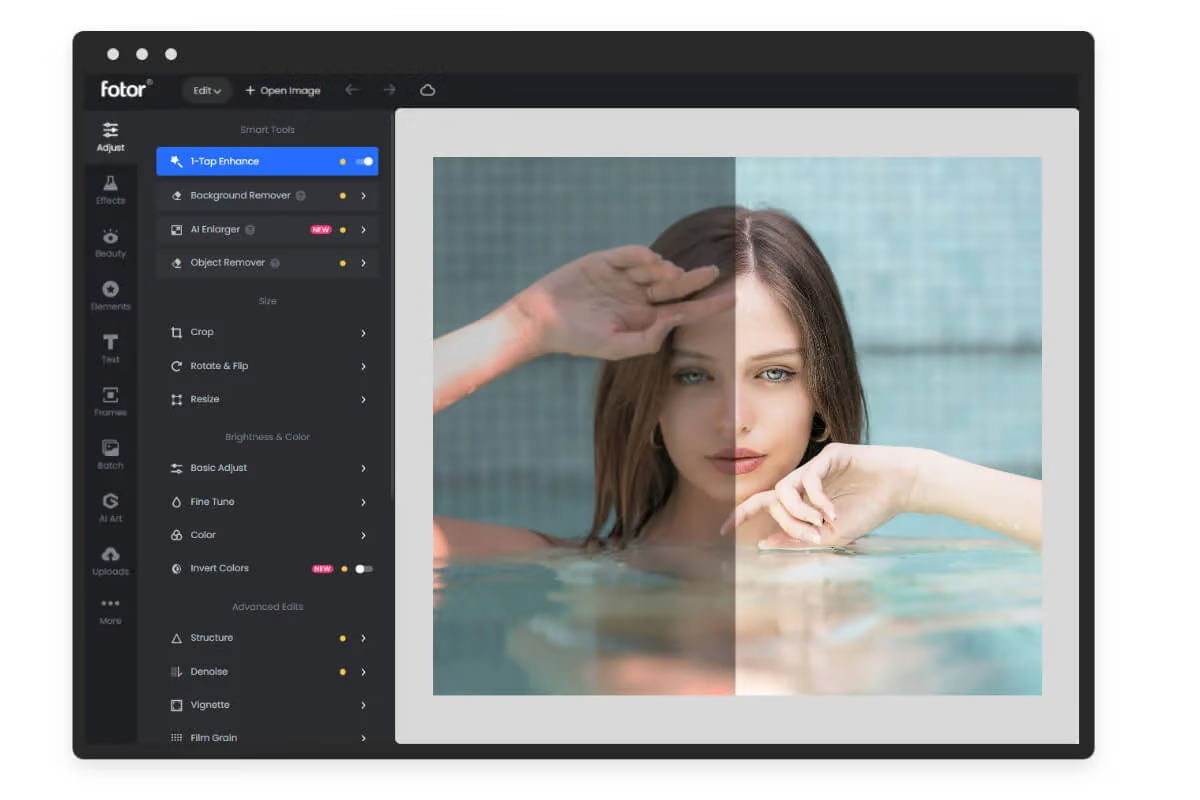
- Upload a Photo:
- Visit Fotor’s website and click on “Edit a Photo”.
- Upload your blurry photo.
- Sharpen the Image:
- Go to the “Adjust” menu.
- Increase the “Sharpness” slider until the photo looks clearer.
- Optionally, adjust the “Clarity” and “Contrast” sliders for better results.
- Save Your Photo:
- Click on “Save” to download the enhanced photo to your device.
Pixlr
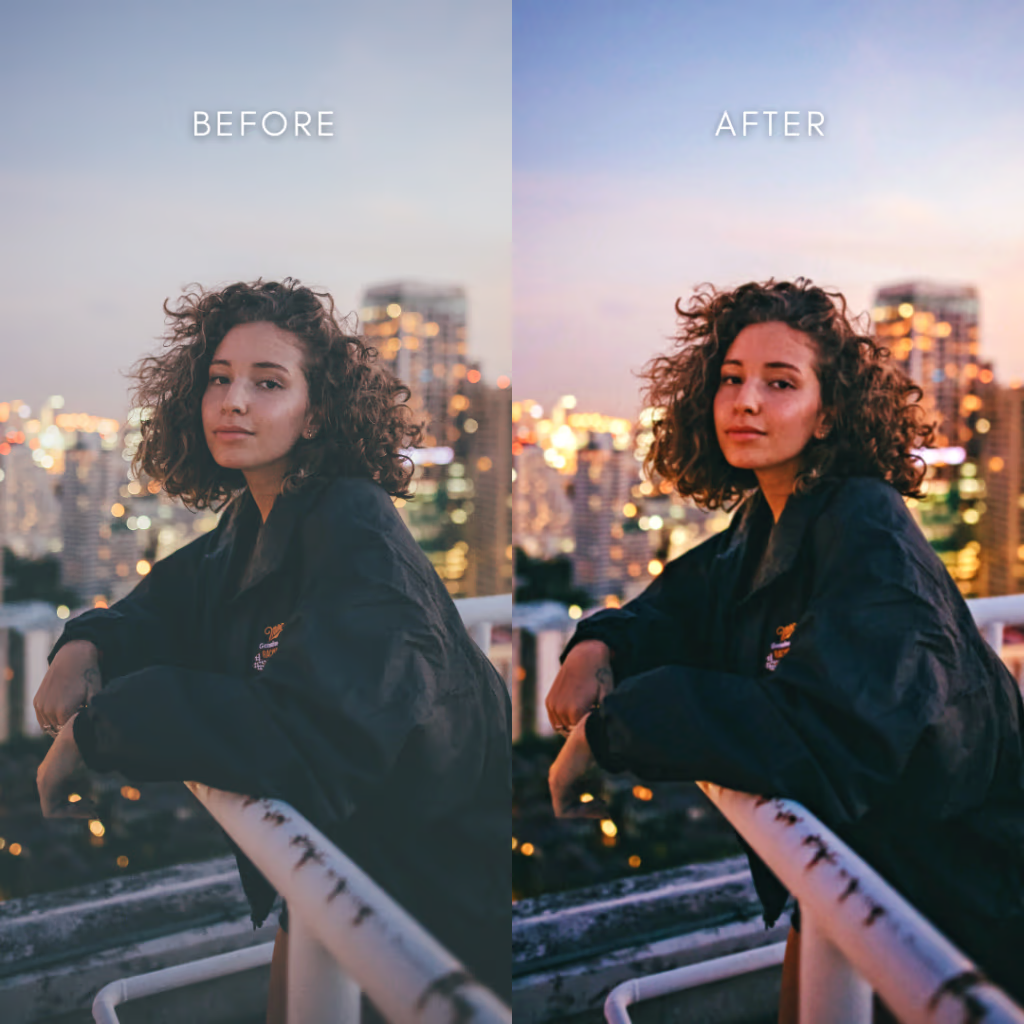
- Upload a Photo:
- Visit Pixlr’s website and choose Pixlr X (the simpler editor) or Pixlr E (the advanced editor).
- Upload your blurry photo.
- Use the Sharpen Tool:
- In Pixlr X: Select the “Adjust” menu and increase the “Sharpness” slider.
- In Pixlr E: Go to “Filter” > “Sharpen” and adjust the settings.
- Enhance Further:
- Adjust brightness, contrast, and clarity to improve the photo’s overall quality.
- Save Your Photo:
- Click “Save” to download your enhanced photo.
Enhance.Pho.to
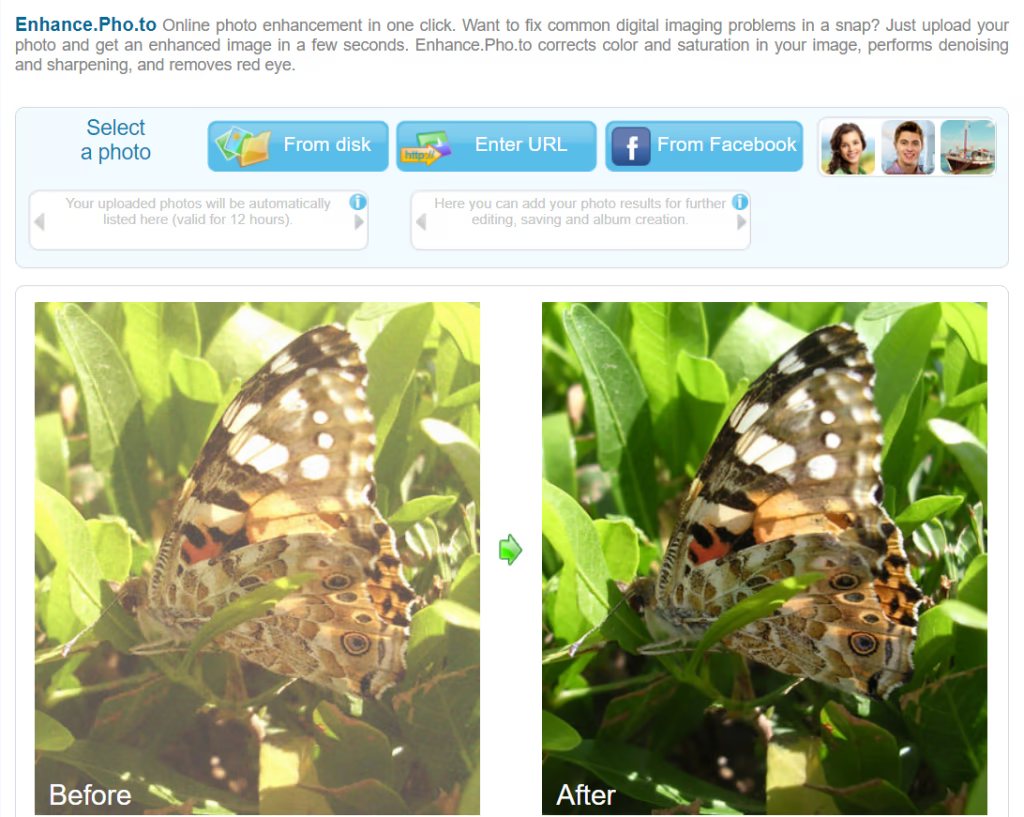
- Upload a Photo:
- Visit Enhance.Pho.to and click on “Enhance your photo”.
- Upload your blurry photo.
- Automatic Enhancements:
- The tool will automatically apply sharpness and clarity adjustments.
- You can tweak settings manually if needed.
- Save Your Photo:
- Click on “Save & Share” to download your enhanced photo.
Vance AI
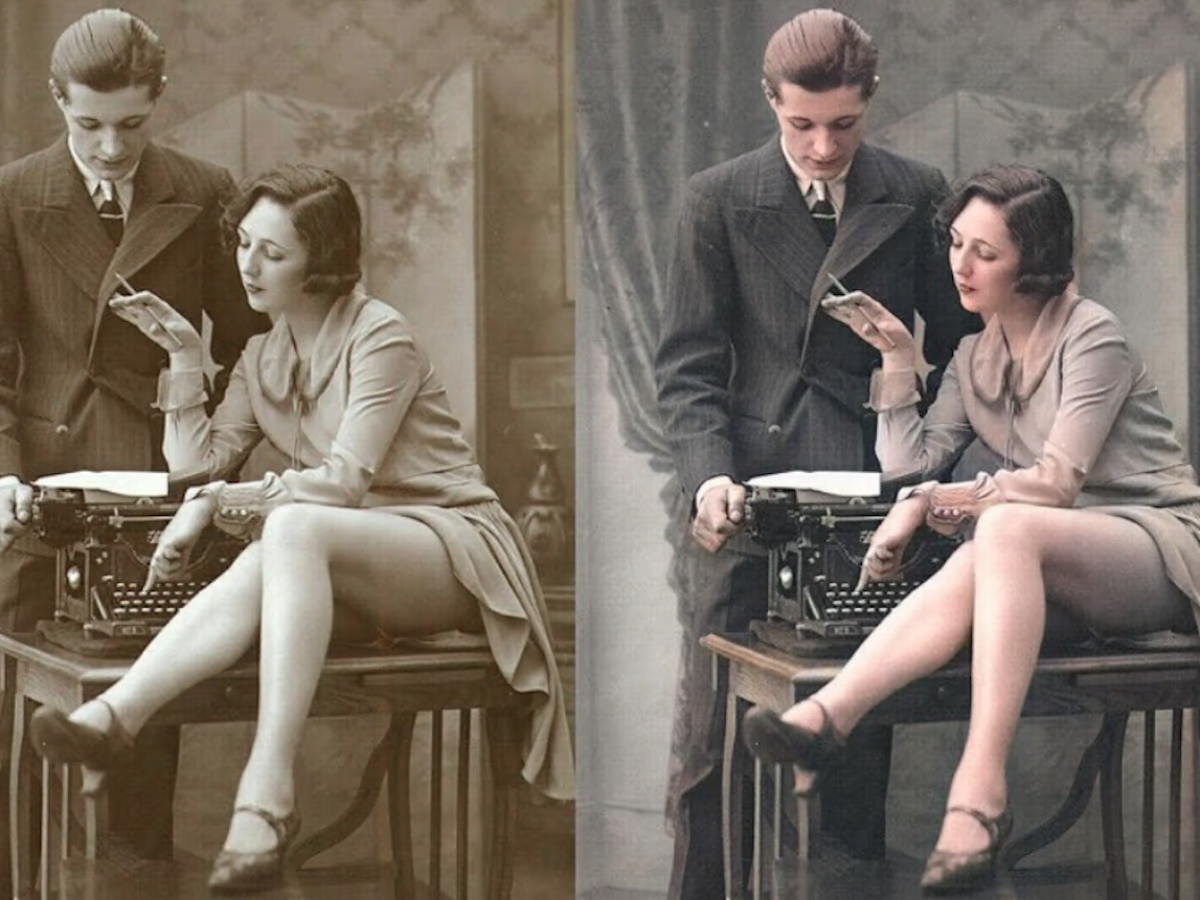
- Upload a Photo:
- Visit Vance AI and choose the “Image Enhancer”.
- Upload your blurry photo.
- Apply AI Enhancements:
- The AI will automatically process the photo to enhance details and clarity.
- Review the result and make any necessary adjustments.
- Save Your Photo:
- Click “Download” to save your enhanced photo.
Example Comparison Table
| Tool | Ease of Use | AI Features | Manual Adjustments | Cost |
|---|---|---|---|---|
| Fotor | High | No | Yes | Free/Paid |
| Pixlr | High | No | Yes | Free/Paid |
| Enhance.Pho.to | Very High | Yes | Limited | Free |
| Vance AI | Very High | Yes | Minimal | Free/Paid |
Tips and Tricks for Best Results
- Start with Small Adjustments: Always start with small adjustments to avoid over-processing the image.
- Use High-Resolution Photos: Higher resolution photos generally produce better results after enhancement.
- Combine Tools: Sometimes using multiple tools can yield better results. For example, start with basic adjustments in Pixlr and then use Vance AI for AI enhancements.
- Regular Practice: Enhancing photos is a skill that improves with practice. Experiment with different settings and tools to find what works best for your specific needs.
Comparing Online Tools with Software Solutions
Pros and Cons of Online Tools
Online tools offer several advantages and disadvantages compared to traditional desktop software. Here are some key points to consider:
Pros
- Accessibility: Online tools can be accessed from any device with an internet connection, making them highly convenient for quick edits on the go.
- Ease of Use: Most online tools have user-friendly interfaces designed for beginners, which means you don’t need extensive photo editing knowledge to enhance your photos.
- Speed: These tools often provide fast processing times, allowing you to enhance photos quickly without the need for extensive setup or installation.
- Cost: Many online tools are free or offer basic features at no cost, making them an economical choice for casual users.
Cons
- Limited Features: Compared to desktop software, online tools may lack advanced features and fine-tuning options, which can limit the extent of photo enhancement.
- Dependency on Internet: An active internet connection is required to use these tools, which can be a drawback in areas with poor connectivity.
- Privacy Concerns: Uploading photos to online platforms can raise privacy issues, especially if the images contain sensitive information.
Pros and Cons of Desktop Software
Desktop software solutions, like Adobe Photoshop and GIMP, offer a different set of benefits and drawbacks:
Pros
- Advanced Features: Desktop software provides a wide range of advanced editing tools and features that allow for precise control over photo enhancements.
- Better Control and Precision: These programs offer detailed adjustment options, layer support, and advanced filters, enabling users to achieve professional-level results.
- Offline Availability: Once installed, desktop software can be used without an internet connection, making it more reliable for users in areas with limited connectivity.
- Higher Quality Outputs: The ability to work with higher resolution images and more sophisticated algorithms often results in better overall photo quality.
Cons
- Learning Curve: Advanced software often comes with a steep learning curve, requiring time and effort to master.
- Cost: High-quality desktop software can be expensive, with some programs requiring subscription fees.
- Resource Intensive: These programs typically require more powerful hardware and can be resource-intensive, which might be a barrier for users with older or less capable devices.
Example Comparison Chart
| Feature | Online Tools | Desktop Software |
|---|---|---|
| Accessibility | High (requires internet) | Low (requires installation) |
| Ease of Use | Very High | Moderate to Low |
| Advanced Features | Limited | Extensive |
| Precision and Control | Moderate | High |
| Privacy | Concerns due to online upload | High (local storage) |
| Cost | Mostly Free/Low-Cost | High (one-time purchase/subscription) |
| Internet Dependency | Yes | No |
Choosing the Right Tool for Your Needs
The choice between online tools and desktop software largely depends on your specific needs and circumstances. For quick, simple enhancements, online tools are often sufficient and convenient. However, if you need advanced editing capabilities and higher quality outputs, investing in desktop software might be worthwhile.
Case Study: Using Online Tools vs. Desktop Software
Consider a scenario where you need to enhance a blurry photo for a professional presentation:
- Using Online Tools:
- You quickly upload the photo to Pixlr, adjust the sharpness and clarity, and get a decent result within minutes.
- However, for more significant blur, the tools might fall short in providing the necessary detail.
- Using Desktop Software:
- You open the photo in Adobe Photoshop, apply an unsharp mask, use deconvolution algorithms, and leverage AI-based filters.
- The process takes longer and requires more effort, but the final result is significantly better, with fine details restored and higher overall quality.
This comparison illustrates how the right tool choice can vary based on the complexity of the task and the desired outcome.
Tips for Preventing Blurry Photos in the Future
Camera Settings and Techniques
Preventing blurry photos starts with understanding and properly using your camera. Here are some practical tips to help you capture sharp images:
Using a Tripod
- Stabilization: A tripod provides a stable base for your camera, reducing the risk of camera shake, especially in low light conditions or with long exposure times.
- Flexibility: Tripods allow for precise framing and composition, giving you the freedom to experiment with different angles and perspectives without worrying about stability.
Proper Focus Techniques
- Auto-Focus: Ensure your camera’s autofocus system is set to the appropriate mode (e.g., single-shot AF for stationary subjects, continuous AF for moving subjects). Most modern cameras have sophisticated autofocus systems that can detect and focus on faces or track moving objects.
- Manual Focus: For critical sharpness, especially in macro photography or low-light situations, consider using manual focus. Use your camera’s focus peaking feature, if available, to highlight in-focus areas.
- Focus Lock: Lock focus on your subject by half-pressing the shutter button, then recompose the shot while maintaining the focus lock.
Correct Shutter Speed
- Shutter Speed Guidelines: Use faster shutter speeds to freeze motion and reduce blur. A general rule is to use a shutter speed that is at least as fast as the reciprocal of your lens’s focal length (e.g., for a 100mm lens, use a shutter speed of 1/100 second or faster).
- Motion Blur Reduction: For moving subjects, increase the shutter speed. For instance, capturing sports or wildlife may require shutter speeds of 1/1000 second or faster.
Adequate Lighting
- Natural Light: Shoot in well-lit environments to allow your camera to use faster shutter speeds. Natural light is often the best and most flattering light source.
- Artificial Light: When natural light is insufficient, use artificial lighting such as flashes or continuous lights. Ensure the light is properly diffused to avoid harsh shadows and highlights.
- High ISO Performance: Modern cameras offer high ISO settings that can compensate for low light, but be mindful of the noise that higher ISO levels can introduce. Use noise reduction software if necessary.
Editing Techniques for Better Quality
Editing can further enhance the quality of your photos, even if they are already sharp. Here are some tips:
Post-Processing Tips
- Sharpening: Use sharpening tools in your photo editing software to enhance details. Be careful not to overdo it, as excessive sharpening can introduce artifacts and noise.
- Noise Reduction: Apply noise reduction, especially when working with high ISO images. Most editing software offers noise reduction sliders that balance detail retention and noise suppression.
- Color Correction: Adjust white balance, saturation, and contrast to improve the overall look of your photo. Correcting color casts can make your images more visually appealing.
Recommended Software and Tools
- Adobe Lightroom: Offers powerful tools for sharpening, noise reduction, and overall photo enhancement.
- Capture One: Known for its excellent color grading capabilities and advanced sharpening tools.
- Topaz Labs Sharpen AI: Uses AI technology to enhance details and reduce blur, particularly effective for motion blur and out-of-focus images.
Example: Preventing Blurry Photos in a Low Light Environment
- Scenario: Photographing a night scene with city lights.
- Equipment: DSLR camera, 50mm lens, tripod.
- Camera Settings:
- Set the camera on a tripod to stabilize.
- Use a shutter speed of 1/60 second or faster.
- Open the aperture to f/1.8 to let in more light.
- Set ISO to 800, balancing exposure and noise.
- Shooting Technique:
- Lock focus on a prominent part of the scene.
- Use a remote shutter release or timer to avoid camera shake.
- Post-Processing:
- In Adobe Lightroom, adjust sharpness and clarity.
- Apply noise reduction to manage ISO noise.
- Enhance colors and contrast to make the lights pop.
Following these steps can help you capture stunning, blur-free photos, even in challenging lighting conditions.
Frequently Asked Questions (FAQs)
Can all blurry photos be fixed?
No, not all blurry photos can be completely fixed, but many can be significantly improved. The extent to which a blurry photo can be enhanced depends on several factors, including the severity and type of blur, the resolution of the photo, and the tools used. For minor blurs, basic adjustments like sharpening and clarity can make a noticeable difference. For more severe blurs, advanced techniques like deconvolution algorithms and AI-based enhancements can help, but they may not restore the image to perfect clarity.
Are online tools safe to use?
Generally, yes, online tools are safe to use, but it’s important to choose reputable websites. Trusted online tools like Fotor, Pixlr, and Vance AI have good privacy policies and secure connections to ensure your photos are safe. However, it’s always a good practice to avoid uploading sensitive or private images to any online platform. Check the tool’s privacy policy and user reviews to ensure your data is protected.
Do online tools reduce photo quality?
It depends on the tool and the adjustments made. Many online tools are designed to enhance photos without significantly reducing quality. However, aggressive sharpening or excessive adjustments can introduce artifacts and noise, potentially degrading the image quality. It’s essential to use the tools judiciously and preview the results before saving. Higher-end tools and AI-based solutions often preserve the original quality while enhancing details.
How long does it take to enhance a photo online?
The time required to enhance a photo online varies based on the tool used and the complexity of the adjustments. Basic enhancements using tools like Fotor or Pixlr can be done in a few minutes. More advanced processes, such as using AI-based tools like Vance AI, might take a bit longer, especially for high-resolution images. Typically, the entire process can range from a couple of minutes to around 10 minutes, depending on the internet speed and the tool’s processing capabilities.
Are there any free online tools for enhancing blurry photos?
Yes, there are several free online tools available for enhancing blurry photos. Tools like Enhance.Pho.to offer completely free services with good results. Other tools like Fotor and Pixlr offer free versions with basic features and optional paid upgrades for more advanced functionalities. These free tools can be quite effective for casual use and basic enhancements.
Can mobile apps enhance blurry photos as well as online tools?
Yes, many mobile apps can enhance blurry photos effectively, offering similar features to online tools. Apps like Adobe Photoshop Express, Snapseed, and VSCO provide powerful editing capabilities right on your smartphone. These apps are convenient for quick edits on the go and often include advanced features like AI enhancements, sharpening tools, and noise reduction. While they may not always match the precision of desktop software, they are highly effective for most users.
What are the best settings to use when enhancing a photo?
The best settings vary depending on the specific photo and the type of blur. However, some general guidelines include:
- Sharpness: Increase gradually to enhance edges without introducing too much noise.
- Clarity: Adjust to enhance mid-tone contrast and detail.
- Contrast: Use to make the photo more visually appealing by enhancing differences between light and dark areas.
- Noise Reduction: Apply as needed to reduce graininess, especially in high ISO images.
- AI Features: Utilize AI-based tools for automatic enhancements, which can provide significant improvements with minimal manual adjustment.
Experimenting with these settings while previewing the changes can help you achieve the best results for your specific photo.
Conclusion
Enhancing blurry photos online has become more accessible and effective than ever before. With a variety of tools available, from basic adjustments to advanced AI-driven enhancements, anyone can improve the quality of their photos with minimal effort. Whether you are using free tools like Enhance.Pho.to or more advanced options like Vance AI, the right approach can make a significant difference.
Remember, preventing blurry photos in the first place by using proper camera settings and techniques is always the best strategy. However, for those times when blur is unavoidable, understanding the causes and knowing how to use the right tools can save many precious memories from being lost to poor image quality.
We hope this comprehensive guide has provided you with the knowledge and confidence to enhance your blurry photos online. Don’t hesitate to try out the mentioned tools and techniques, and share your experiences or any further questions in the comments below. Happy editing!

